こんにちは、タクトシステムRPAチームです。
ChatGPTのAPIであるOpenAI APIを活用してExcelでChatGPTを動かしてみたり、チャットアプリにChatGPTを実装したりしてきましたが、続きましてはOpenAI APIの画像生成の仕組みを試してみました。OpenAI APIにはプロンプト(テキスト入力)をもとに画像生成ができる仕組みも存在します。
今回はそんな画像生成AIを実験しつつ、活用法について探ってみました。
目次
画像生成 API DALL-E 2
OpenAI API での画像生成は DALL-E 2 を使用します。
DALL-E 2(だりー・つー)はChatGPT同様、入力したプロンプトから画像またはイメージを生成することが可能です。
DALL-E 2 is an AI system that can create realistic images and art from a description in natural language.
(ChatGPTで翻訳)
DALL-E 2は、自然言語での説明からリアルな画像やアートを作成することができるAIシステムです。引用元:DALL-E 2ウェブサイト
DALL-E 2は2022年4月にOpenAIより発表され、2022年11月にAPIがリリースされました。
DALL-E 2とは
DALL-E 2の説明はウェブサイトのトップにある動画を見たほうがわかりやすいので、ここではAPIの種類とサンプルの紹介をします。
- Image generation(画像生成)
- Outpainting(上塗り)
- Inpainting(修復)
- Variations(バリエーション)
プロンプトから画像を生成したり、画像をマスクしてあらたな画像を生成したり、既存画像のバリエーションを作成することが可能です。
Image generation(画像生成)
Image generation は入力したプロンプトから画像を生成してくれます。現時点ではどうも日本語は苦手なようで、英語で入力した方がよい結果が得られます。
プロンプトに a white siamese cat(白いシャム猫) と入力してDALL-E 2を実行すると…
↓

a white siamese cat
画像が生成されました!
DALL-E 2 can create original, realistic images and art from a text description. It can combine concepts, attributes, and styles.
(ChatGPTで翻訳)
DALL-E 2は、テキストの説明からオリジナルでリアルな画像やアートを作成できます。概念、属性、スタイルを組み合わせることができます。
Outpainting(上塗り)
Outpainting は画像の外側を拡張してプロンプトに応じた画像を生成してくれます。
大きな川と河川敷の画像があります。
↓
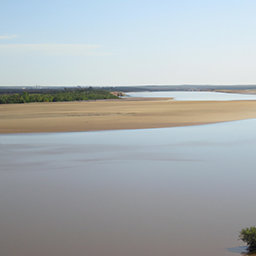
大きな川と河川敷
↓
画像を拡張して外側に透明のマスクを作成します。
↓
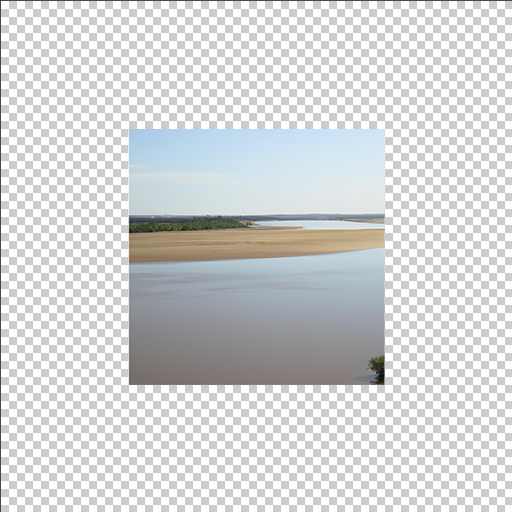
外側に透明のマスクを作成
↓
もとの画像とこのマスク処理画像を指定し、自然な景色を生成したかったのでプロンプトに landscape(風景) と入力してDALL-E 2を実行すると…
↓
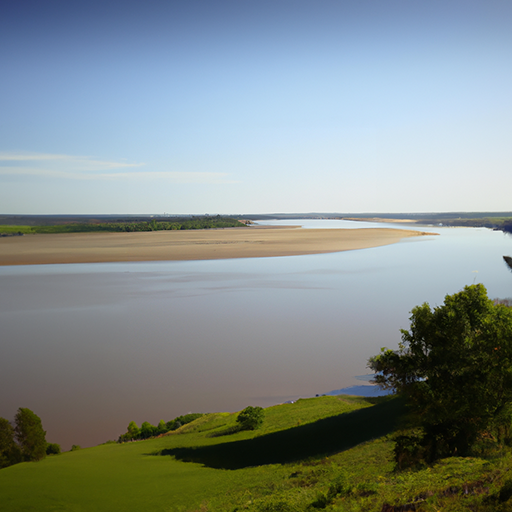
Outpainting
画像の拡張された部分に風景が生成されました!
DALL-E 2 can expand images beyond what’s in the original canvas, creating expansive new compositions.
(ChatGPTで翻訳)
DALL-E 2は、元のキャンバスを超えて画像を拡張し、広大な新しい構成を作成できます。
Inpainting(修復)
Inpainting は画像の一部にマスクを施したファイルをもとに、そのマスク内にプロンプトから画像を生成します。生成された画像はマスクに合わせて自然な感じに溶け込みます。
大きな川と河川敷の画像があります。
↓

大きな川と河川敷
↓
画像の一部を透明にしてマスク処理します。
↓
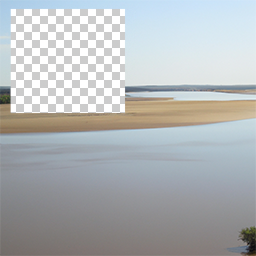
透明のマスク処理
↓
もとの画像とこのマスク処理画像を指定し、プロンプトに big tree(大きな木) と入力してDALL-E 2を実行すると…
↓
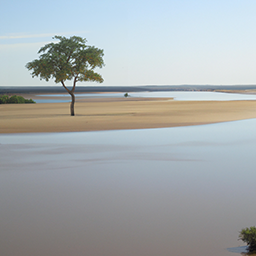
Inpainting
マスクした部分に大きな木の画像が生成されました!
DALL-E 2 can make realistic edits to existing images from a natural language caption. It can add and remove elements while taking shadows, reflections, and textures into account.
(ChatGPTで翻訳)
DALL-E 2は、自然言語のキャプションから既存の画像に対して現実的な編集を行うことができます。影、反射、テクスチャを考慮に入れつつ、要素を追加および削除できます。
Variations(バリエーション)
Variations はもとの画像からバリエーションを作成します。
大きな川と河川敷の画像があります。
↓

大きな川と河川敷
↓
もとの画像を指定してDALL-E 2を実行すると…
↓
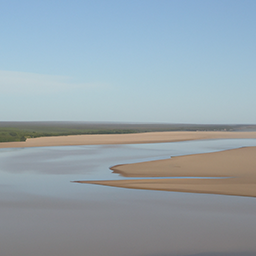 |
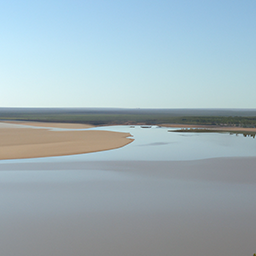 |
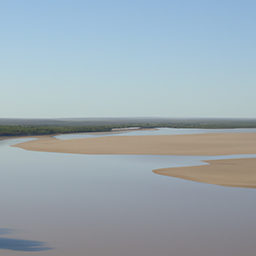 |
もとの画像に似たバリエーション画像が作成されました!
DALL-E 2 can take an image and create different variations of it inspired by the original.
(ChatGPTで翻訳)
DALL-E 2は、画像を取得して、オリジナルに触発されたさまざまなバリエーションを作成できます。
DALL-E 2をプログラムで実装する
DALL-E 2の Image generation をいろいろなプログラムで実装してみました。
APIで送信するパラメータは以下の3つです。
| パラメータ | 説明 | 備考 |
| prompt | プロンプト(画像のイメージとなるテキスト) | 日本語はまだ苦手? 英語の方が精度が高い |
| n | 画像の数 | 1〜10までだが6以上はエラーになる率が高い |
| size | 画像サイズ | 256×256/512×512/1024×1024 px ※3種類のみ |
APIの使用には、まずAPI keysの取得が必要です。また、GoogleAppsScript以外パラメータはハードコーディングです。
AppleScript
use AppleScript version "2.4" -- Yosemite (10.10) or later
use framework "Foundation"
use scripting additions

property apiKey : "<OPENAI_API_KEY>"

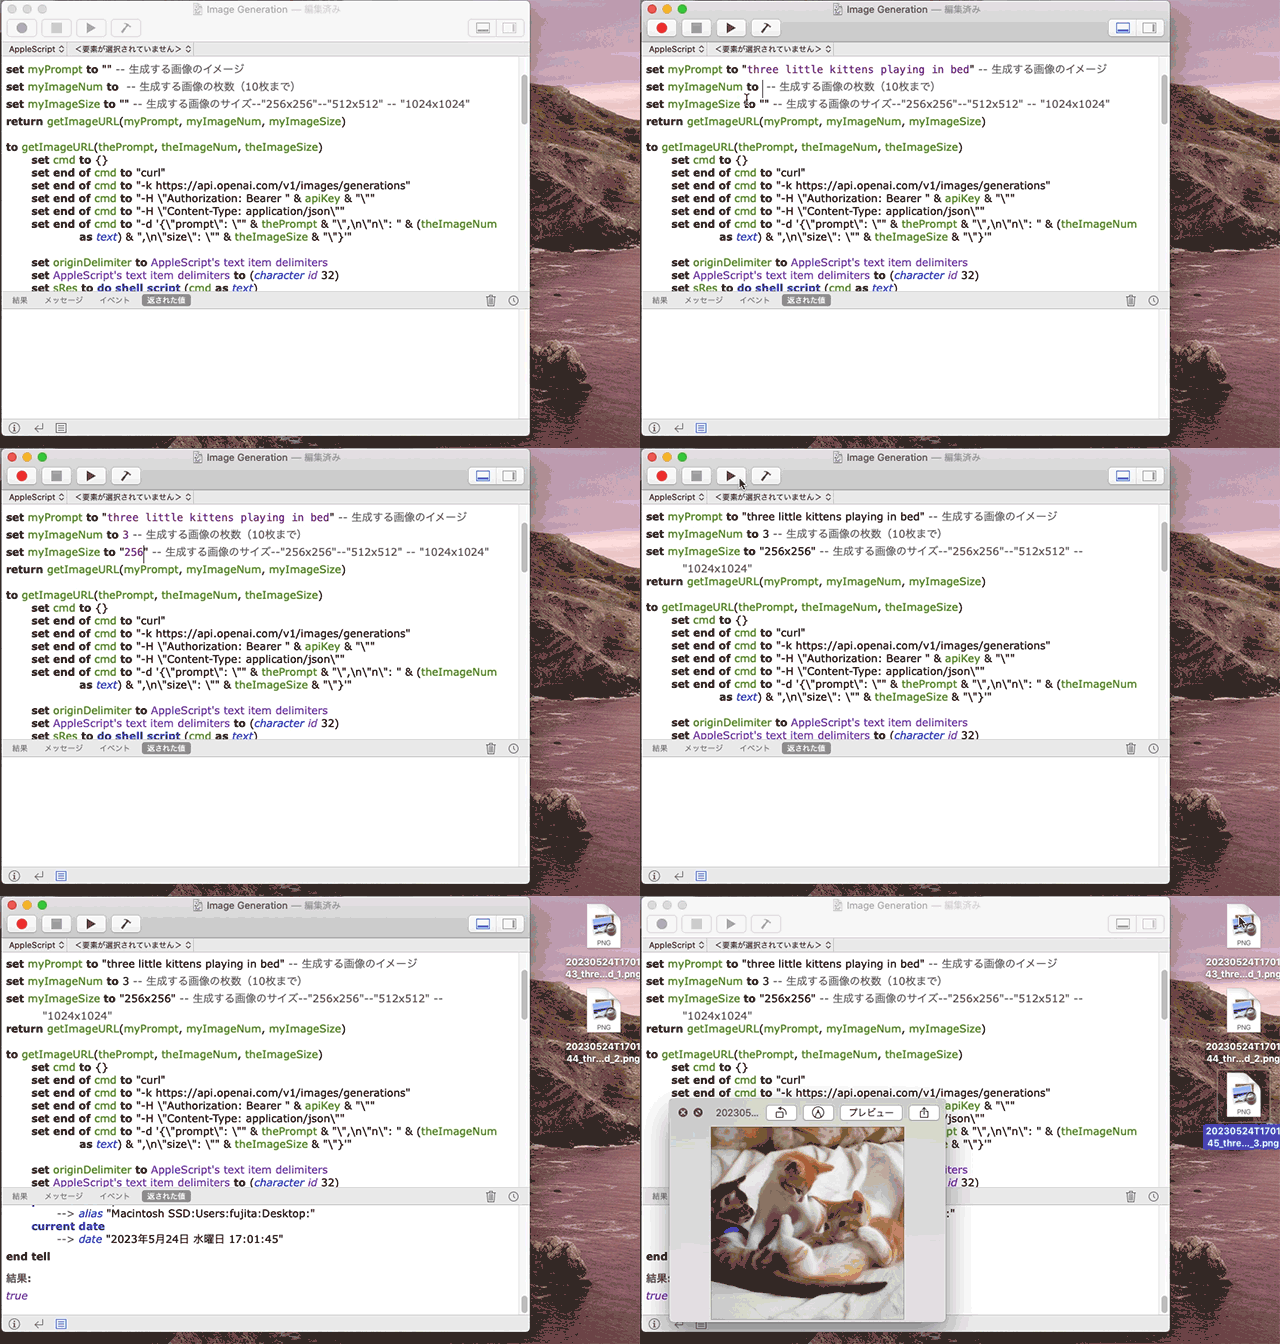
set myPrompt to "three little kittens playing in bed" -- 生成する画像のイメージ
set myImageNum to 3 -- 生成する画像の枚数(10枚まで)
set myImageSize to "256x256" -- 生成する画像のサイズ--"256x256"--"512x512" -- "1024x1024"
return getImageURL(myPrompt, myImageNum, myImageSize)

to getImageURL(thePrompt, theImageNum, theImageSize)
	set cmd to {}
	set end of cmd to "curl"
	set end of cmd to "-k https://api.openai.com/v1/images/generations"
	set end of cmd to "-H \"Authorization: Bearer " & apiKey & "\""
	set end of cmd to "-H \"Content-Type: application/json\""
	set end of cmd to "-d '{\"prompt\": \"" & thePrompt & "\",\n\"n\": " & (theImageNum as text) & ",\n\"size\": \"" & theImageSize & "\"}'"

	set originDelimiter to AppleScript's text item delimiters
	set AppleScript's text item delimiters to (character id 32)
	set sRes to do shell script (cmd as text)
	set AppleScript's text item delimiters to originDelimiter

	set jsonString to current application's NSString's stringWithString:sRes
	set jsonData to jsonString's dataUsingEncoding:(current application's NSUTF8StringEncoding)
	set aRes to current application's NSJSONSerialization's JSONObjectWithData:jsonData options:0 |error|:(missing value)
	if aRes is missing value then
		return false
	else
		set dataList to |data| of (aRes as record)
		repeat with i from 1 to theImageNum
			set imageUrl to |url| of item i of dataList
			downloadImageData(i, imageUrl, thePrompt) of me
		end repeat
	end if
	return true
end getImageURL

to downloadImageData(i, imageUrl, myPrompt)
	set destinationPath to POSIX path of (path to desktop folder)
	set imageDataName to my formattedNowDate() & "_" & myPrompt & "_" & (i as text) & ".png"

	-- NSURLとNSDataを使って画像をダウンロードし、ローカルに保存
	set imageURLObject to current application's |NSURL|'s URLWithString:imageUrl
	set imageData to current application's NSData's dataWithContentsOfURL:imageURLObject
	set destinationURL to current application's |NSURL|'s fileURLWithPath:(destinationPath & imageDataName)
	imageData's writeToURL:destinationURL atomically:true
	return true
end downloadImageData

-- 日付を文字列にする。
on formattedNowDate()
	-- 現在の日付と時間を取得
	set currentDate to current date

	-- 年、月、日、時間、分、秒を取得
	set theYear to (year of currentDate) as string
	set theMonth to (month of currentDate as integer) as string
	set theDay to (day of currentDate) as string
	set theHour to (hours of currentDate) as string
	set theMinute to (minutes of currentDate) as string
	set theSecond to (seconds of currentDate) as string

	-- 数値が1桁の場合は、先頭に0を追加
	if length of theMonth is 1 then set theMonth to "0" & theMonth
	if length of theDay is 1 then set theDay to "0" & theDay
	if length of theHour is 1 then set theHour to "0" & theHour
	if length of theMinute is 1 then set theMinute to "0" & theMinute
	if length of theSecond is 1 then set theSecond to "0" & theSecond

	-- 形式を整えて結果を取得
	set formattedDate to theYear & theMonth & theDay & "T" & theHour & theMinute & theSecond

	return formattedDate
end formattedNowDate
AppleScriptではcurlで命令を送ってデスクトップにPNGファイルを作成する仕様としました。画像ファイル名は生成された時間+プロンプト名です。
AppleScriptですのでmacOSでのみ動作します。
GoogleAppsScript
// API Key
const apiKey = '<OPENAI_API_KEY>'

// スプレッドシート表示の際に呼出し
function onOpen() {
  // シート
  var ss = SpreadsheetApp.getActiveSpreadsheet();

  //スプレッドシートのメニューにカスタムメニューを作成
  var subMenus = [];
  subMenus.push({
    name: "実行",
    functionName: "getImageURL"
  });
  ss.addMenu("ImageGeneration", subMenus);
}

function getImageURL(){
  var ss = SpreadsheetApp.getActiveSpreadsheet();
  var sh = ss.getSheetByName('ImageGenaration');

  var prompt = sh.getRange(2,3).getValue();
  var imageNum = sh.getRange(3,3).getValue();
  var imageSize = sh.getRange(4,3).getValue();

  var url = 'https://api.openai.com/v1/images/generations';

  const headers = {
    'Content-type': 'application/json',
    'Authorization': 'Bearer ' + apiKey
  }

  const data = {
    "prompt": prompt,
    "n": imageNum,
    "size": imageSize
  }

  const options = {
    'muteHttpExceptions' : true,
    'headers': headers,
    'method': 'post',
    'payload': JSON.stringify(data)
  };
  const response = JSON.parse(UrlFetchApp.fetch(url, options).getContentText());
  Logger.log(response);

  // 画像URLの値を消去
  sh.getRange("B7:B16").clearContent();

  // 生成される画像ごとにループする
  for(i=0;i<imageNum; i++){
    var imageUrl = response.data[i].url;
    sh.getRange(7 + i, 2).setValue(imageUrl);
    // downloadImageToDrive(i, imageUrl, prompt); // 画像をGoogleドライブに保存する場合はコメントをオンにする
  }
}

function downloadImageToDrive(i, imageUrl, prompt) {
  var folderId = '<Google Drive Folder ID>'; // 保存先のGoogleドライブフォルダIDを指定してください
  var folder = DriveApp.getFolderById(folderId);
  var imageBlob;

  try {
    var response = UrlFetchApp.fetch(imageUrl);
    if (response.getResponseCode() == 200) {
      imageBlob = response.getBlob();
      var now = new Date();
      var formattedDateTime = Utilities.formatDate(now, 'JST', 'yyyyMMdd\'T\'HHmmss');
    } else {
      throw new Error('画像が見つかりません。');
    }
  } catch (error) {
    Logger.log('エラー: %s', error);
    return;
  }

  var fileName = formattedDateTime + '_' + prompt + '_' + String(i + 1) + '.png'; // 保存する画像ファイルの名前を指定してください
  folder.createFile(imageBlob.setName(fileName));
}
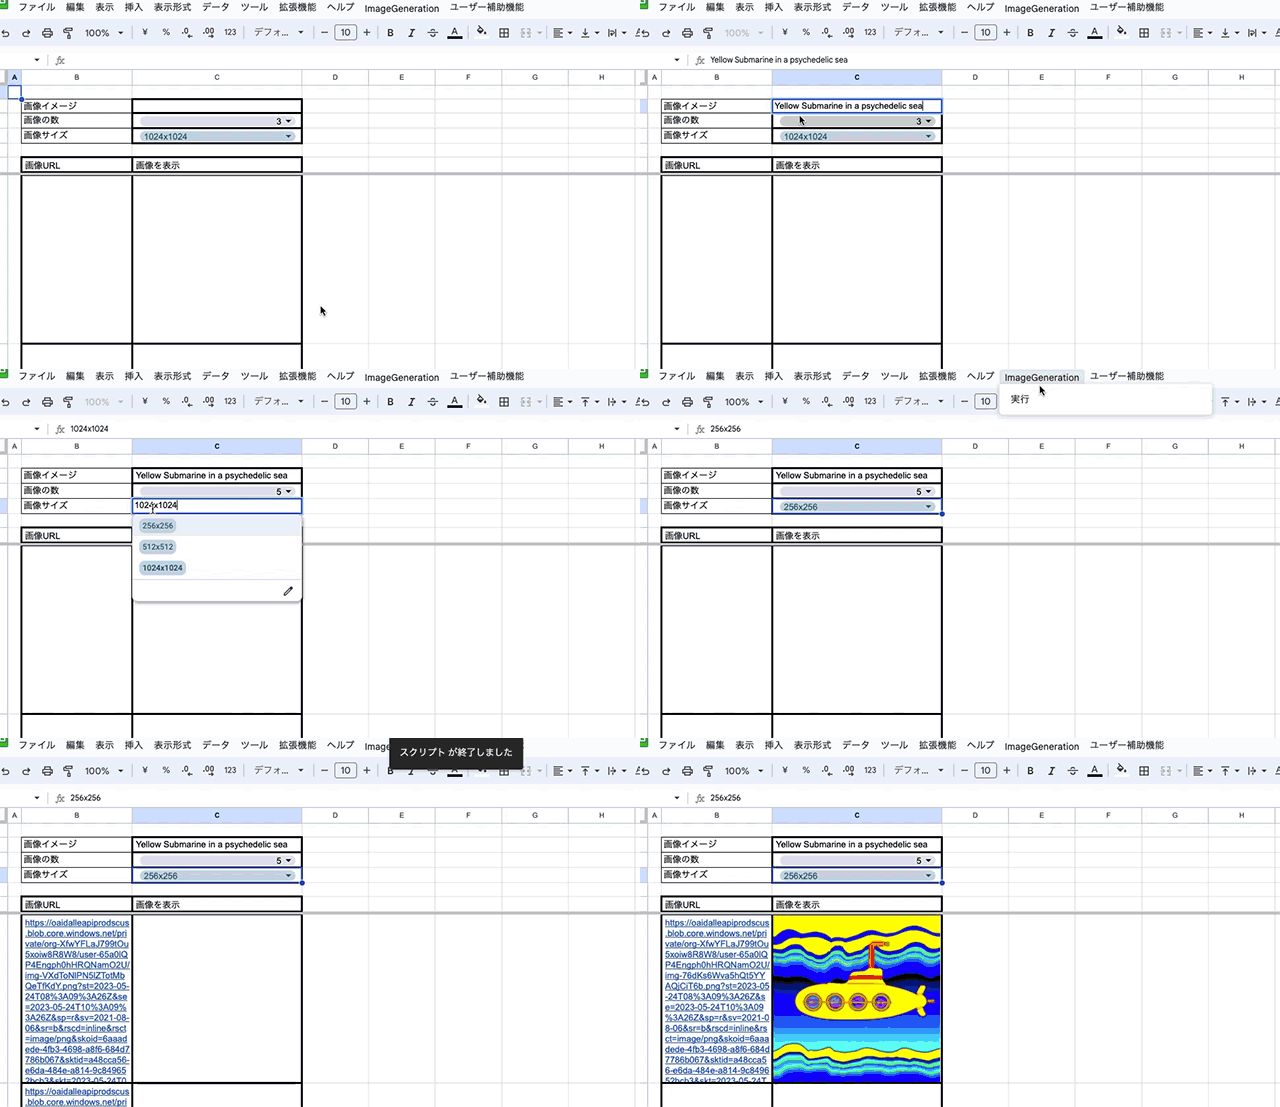
GoogleAppsScriptではGoogleスプレッドシートに プロンプト(画像イメージ)(セルC2) 画像の数(セルC3) 画像サイズ(セルC4) のセルを作成してその値を読み取っています。APIの戻り値はURLなので セルB7:B16 に格納して 隣のセルC7:C16 にGoogleスプレッドシートのIMAGE関数を設定して画像を表示しています。
画像ファイルをGoogleドライブに保存するには 55行目 のコメントをオンにして 保存先のGoogleドライブフォルダID を指定してください。
上記のサンプルではGoogleスプレッドシートの右上に ImageGeneration というメニューを付けて実行するコマンドを登録しました。
GoogleスプレッドシートですのでOSに関係なく動作可能です。
Python
import openai
import requests
from datetime import datetime
import os

# APIキー
openai.api_key = "<OPENAI_API_KEY>"

input = 'View of the Eiffel Tower and Paris' #生成する画像のイメージ
image_num = 3 #生成する画像の枚数(10枚まで)
image_size = '256x256' #"256x256" #"512x512" #"1024x1024"

response = openai.Image.create(
  prompt = input,
  n = image_num,
  size = image_size
)
image_url_array = response['data']

for i in range(image_num):
  image_url = image_url_array[i].url
  response = requests.get(image_url)
  if response.status_code == 200:
      desktop_path = os.path.join(os.path.expanduser('~'), 'Desktop')
      formatted_now = datetime.now().strftime('%Y%m%dT%H%M%S')
      file_name = formatted_now + '_' + input + '_' + str(i + 1) + '.png'
      file_path = os.path.join(desktop_path, file_name)
      with open(file_path, 'wb') as file:
          file.write(response.content)
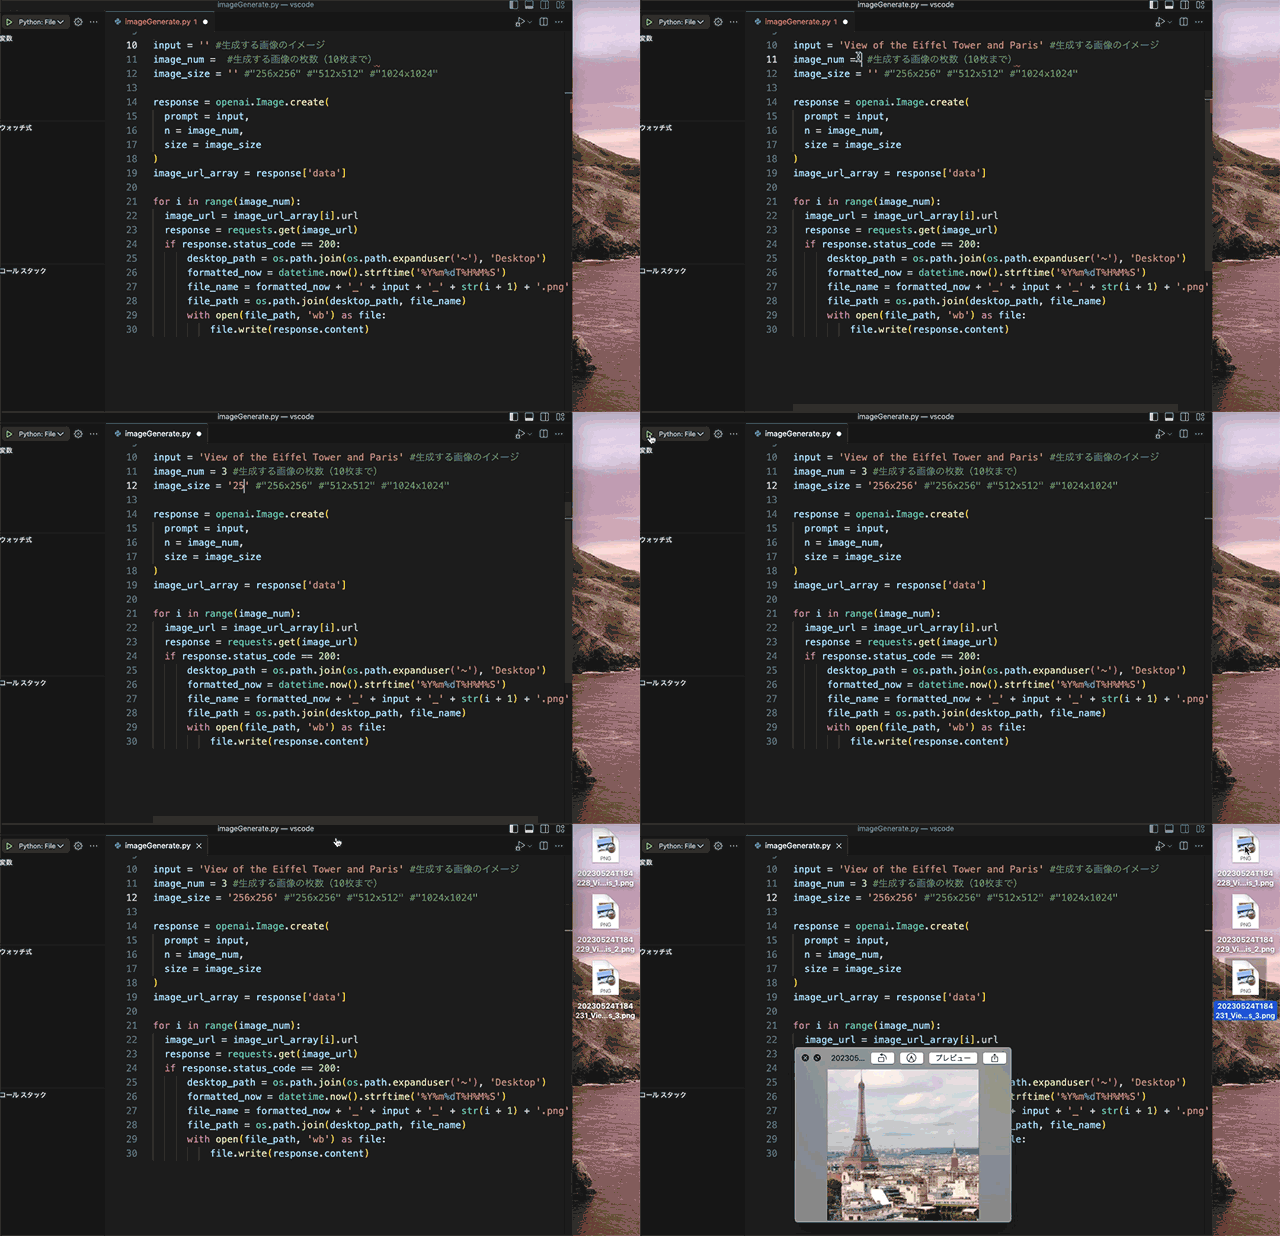
Pythonは openai モジュールをインポートして実行します。取得したURLを requests モジュールで画像生成し、デスクトップに画像ファイルとして作成します。
macOSでもWindowsでも動作します。
チャットアプリ(Rocket.Chat)で画像生成
Rocket.Chatというチャットアプリで、botに対してプロンプトをリクエストすると画像を生成してくれるようにしてみました。詳しくはこちら。
DALL-E 2についての雑感
プロンプトで画像を生成してくれるのでなかなか画期的ではありますが、DALL-E はBing Image Creatorだと日本語で画像生成ができるのでBingで操作した方が使いやすいのは否めません。また、後発ですがAdobe FireflyはDALL-E 2と同等の操作をウェブブラウザ上でGUI操作できるので、より使いやすいインターフェイスだと思いました。そして極めつけはこのFireflyの機能を活用したAdobe Photoshopの 生成塗りつぶし機能 です。生成塗りつぶしについてはこちらの記事で紹介しています。さらに、Google BardはAdobe Fireflyと連携を発表したりと、画像生成AI競争は各社入り乱れた激化の様相を呈しています。また、その他にもStable Diffusion、MidJourney、にじジャーニー、Canvaなど画像生成ができるサービス・アプリケーションは枚挙にいとまがありません。
とはいえユーザーにとっては選択肢が増えるのはありがたいことで、ちょっとしたイメージ画像も今後は自分で生成するようになっていくのではないでしょうか。また今回スクリプトで処理をおこなったような、APIで画像生成するツール開発の機会も今後増えていきそうです。APIを活用したスクリプト開発のご相談お待ちしております。


